
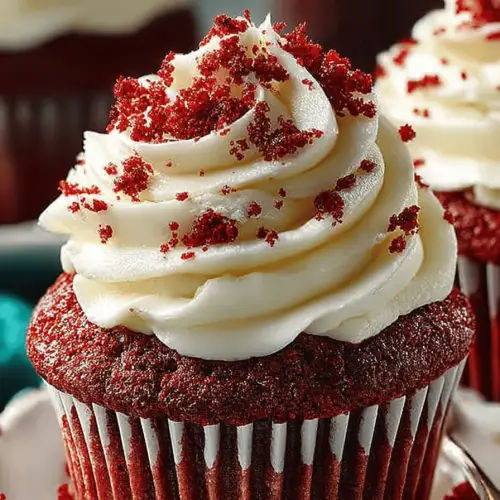
Delish Red Velvet Cupcakes
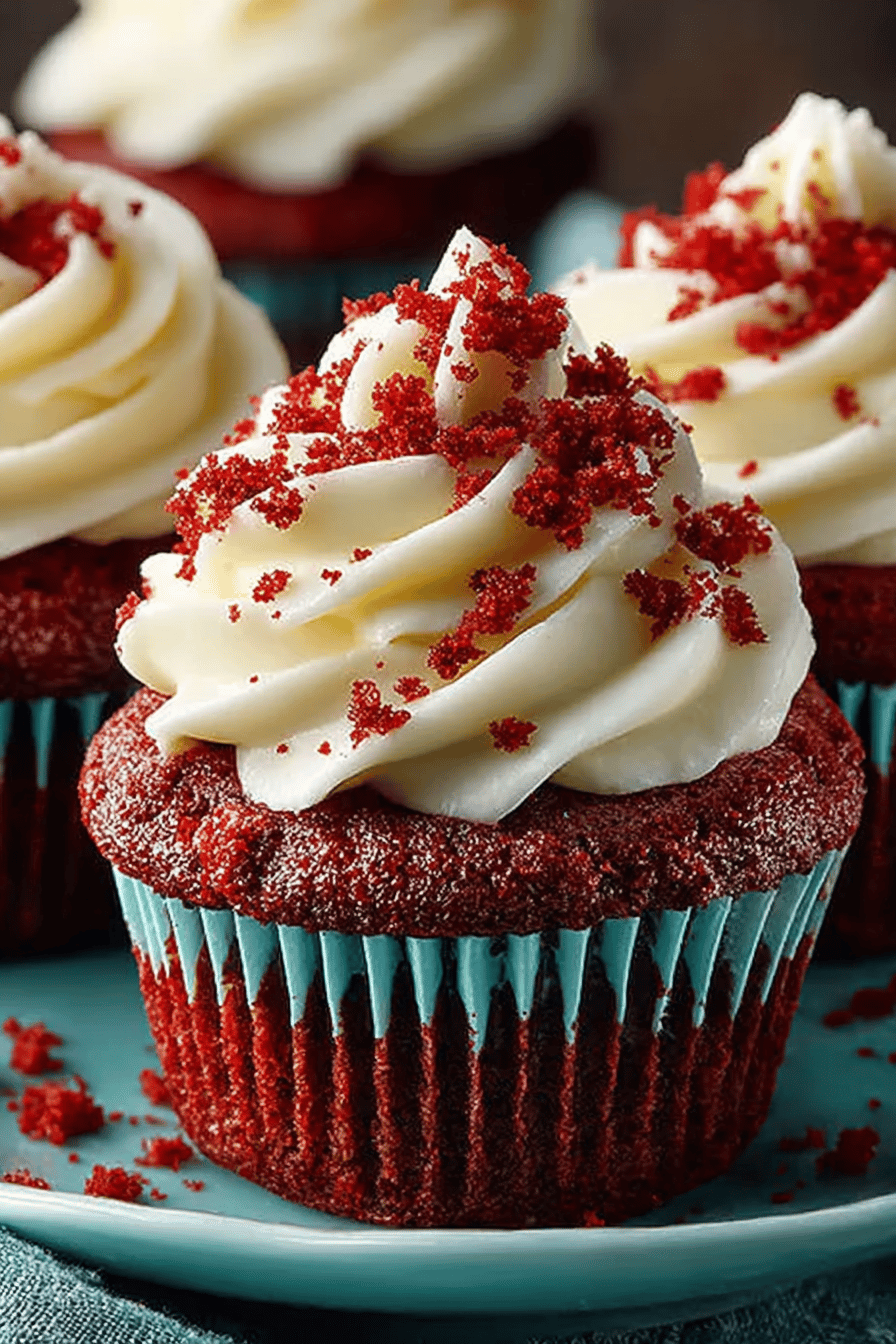
Gather ’round, my fellow human beings! Today, I’m sharing a recipe that’s rocked my world: Delish Red Velvet Cupcakes. If you haven’t been to the red velvet side of life yet, you’re totally missing out! This little gem is all about that deep, rich cocoa flavor with a pop of stunning red; it’s that sweet, cozy hug at the end of a long day. You should totally try this — it’s like baking yourself a blissful moment.
Oh boy, does my family rave about these cupcakes! My husband’s convinced they’re what dreams are made of, and my kids count the hours until they can dive into these crimson treasures after school. True story: Our dog once spotted them cooling on the counter and their divine smell was too tempting not to sneak one. That little thief! We’ve whipped up this recipe so many times it’s pretty much etched in our family caste of delicious staples.
MORE OF OUR FAVORITE…
Why You’ll Love This Delish Red Velvet Cupcakes
– They scream “I love you” with every bite — and that goes for the hot messes among us too.
– Perfect for when you need to impress, with zero pressure on the actual fancy skills department.
– The vibrant color makes you feel like an artist with an edible palette, even if your kitchen looks like a war zone afterward.
– It’s red velvet, people! I mean, come on.
How to Make It
Okay, first thing’s first, get your favorite music on since this is a feel-good kind of recipe. Sift together your dry ingredients like you’re a rockstar, even if you spill flour everywhere… whoops! Then grab a bowl — and by bowl, I mean the BIGGEST one you’ve got because things will get messy. Mix your wet and dry ingredients, and don’t stress if it’s not picture perfect. A dash of confidence never hurts! Okay, now divide into little cupcake liners like you’re conducting an orchestra and pop those babies in the oven. They’ll bake up all fluffy and red — just don’t forget SET A TIMER. Seriously, learn from my past mistakes here. When they’re done, the smell alone will have you swooning, pinky promise.
Ingredient Notes
– Flour: It’s your base, obviously. Too much and you’ve got hockey pucks, not cupcakes.
– Cocoa Powder: Don’t skip this buddy — it adds that irresistible depth.
– Red Food Coloring: Just a splash or it’ll look like a murder scene in your batter. Trust me, been there, done that emotion.
Recipe Steps: You must fill the “Recipe Steps” section with a clear, step-by-step version of the instructions. Do not leave it empty. Summarize the main actions from the ‘How to Make It’ section in concise steps. Each step should start with a verb and follow a numbered format.
1. Preheat your oven and line a muffin tin with wrappers.
2. Sift all the dry ingredients and set them aside.
3. In a large bowl, mix your wet ingredients.
4. Combine both dry and wet mixtures until smooth. Don’t overmix!
5. Gently fold in the food coloring until the batter is vibrant red.
6. Fill cupcake liners about 2/3 full and bake until a toothpick comes out clean.
7. Cool the cupcakes before frosting them, if you can resist!
What to Serve It With
Tips & Mistakes
A few goofs here and there? No prob. Just relish the sweet bombshells you’ve created. Frost them with whatever makes you happy — I usually go for cream cheese frosting because, yummm!
Storage Tips
Stick them in an airtight container; otherwise, they get sad and dry like a forgotten romance. Snack on them cold if you’re into that — I’d never judge. Breakfast muffins anyone? Why not!
Variations and Substitutions
If you’re out of anything, don’t panic! Sub honey for sugar or use buttermilk if you’re feeling wild. Sometimes improvisation leads to magic (or creative new kitchen disasters). Skipping baking soda happened once… spoiler: not okay, so don’t go down that path!
Frequently Asked Questions
Delish Red Velvet Cupcakes
Ingredients
Main Ingredients
- 2.5 cups all-purpose flour
- 1.5 cups granulated sugar
- 1 teaspoons baking soda
- 1 teaspoons salt
- 2 tablespoons unsweetened cocoa powder
- 1 cups vegetable oil
- 1 cup buttermilk room temperature
- 2 large eggs room temperature
- 2 tablespoons red food coloring
- 1 teaspoons vanilla extract
- 1 teaspoons white vinegar
Instructions
Preparation Steps
- Preheat oven to 350°F (175°C) and line cupcake pan with liners.
- In a large bowl, sift together flour, sugar, baking soda, salt, and cocoa powder.
- In another bowl, whisk oil, buttermilk, eggs, food coloring, vanilla, and vinegar until smooth.
- Gradually add wet ingredients into dry ingredients and mix until just combined.
- Divide batter evenly into cupcake liners and bake for 18 minutes or until a toothpick comes out clean.
- Let cupcakes cool completely before frosting with cream cheese frosting.