
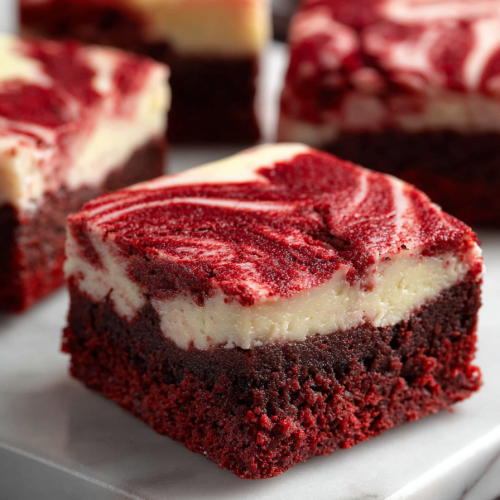
Delish Red Velvet Cheesecake Brownies
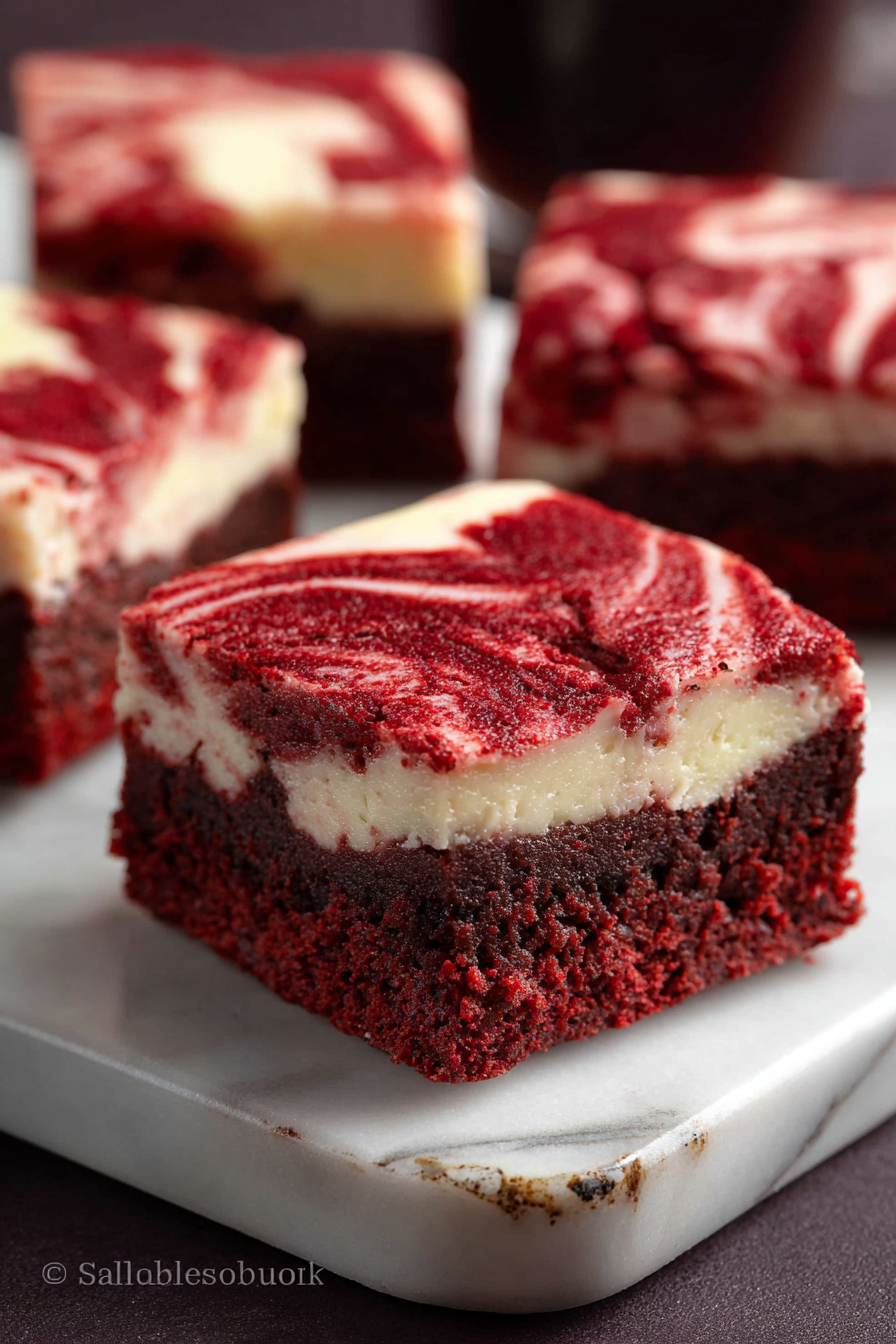
If you like your desserts dramatic and slightly show-offy, meet my Delish Red Velvet Cheesecake Brownies: a two-for-one treat where fudgy brownies and tangy cheesecake flirt loudly in the same pan. It looks fancy because of the marbling, but it’s basically comforting chocolate and cream cheese playing dress-up. Perfect for when you want applause without hiring a pastry chef — or when you need to distract people from whatever else is burning in the oven.
My husband “helped” by insisting we needed more cream cheese swirls. Two bowls later, he declared himself an artiste and dripped red batter down the side of the pan like modern art. The kids tasted the batter with dangerous enthusiasm (I blame the spoon), and our dog performed a heroic theft of one half-baked corner while I Googled “is raw red food dye toxic?” Verdict: chaos, lots of crumbs, and everyone declared it the best disaster I’ve ever made. Yes, this pan was too small. No, I didn’t wash fewer dishes.
MORE OF OUR FAVORITE…
Why You’ll Love This Delish Red Velvet Cheesecake Brownies
– Because it looks like you spent hours on a dessert you actually threw together between soccer practice and existential dread.
– The texture combo: creamy cheesecake meets dense, fudgy brownie. It’s relationship goals for desserts.
– You can serve it to fancy guests and they’ll think you have your life together. Spoiler: you don’t — but the brownies do.
– It’s forgiving. Mess up the swirl? Nobody will know through the fork-shaped holes in your ego.
Time-Saving Hacks
– Use store-bought brownie mix and doctor the batter with cocoa or instant espresso for depth. Feels wrong, tastes right.
– Line your pan with foil so you can lift the whole slab out and cut without scraping the pan clean. Dishwasher schmaschwasher.
– Microwave the cream cheese briefly to soften it faster (5–10 seconds). Yes, it’s a little naughty but it works when you’re late.
– Swap standard measuring for “eyeballing” flour if you’re rushed—just don’t be surprised if texture plays hard to get.
Serving Ideas
Serves: 9–12, depending on how dramatic you want your servings to be and how hungry your family is.
– Dust with powdered sugar and pretend you executed the dusting with a specialized pastry tool. Nobody needs to know it was a sieve and shaky hands.
– Serve with a big scoop of vanilla ice cream and call it modern decadence. Ice cream melts in the most flattering way.
– Pair with black coffee if you’re trying to act refined; pair with milk if you’re admitting this is basically childhood nostalgia in a pan.
– Wine works too—especially if the kids were the ones who ate the corner piece. Serve with wine if the kids drove you nuts.
What to Serve It With
– Fresh berries for color and a pretend-health boost.
– A tiny drizzle of chocolate sauce if you’re trying to impress the dessert-judging aunt.
– Strong coffee or milk depending on your emotional support choice for the evening.
– No garnish and a fork — honest, simple, and the quickest route to happiness.
Tips & Mistakes
– Don’t overmix the cheesecake layer or it’ll be gluey instead of silky. I learned this after making a cheesecake that could have been used as a doorstop.
– Keep an eye on baking time—cheesecake wants to be a little jiggly in the center. Overbake and you’ll get brownie-cheesecake brick.
– If your swirl looks chaotic, congratulations: you made art. Embrace it.
– Yes, the pan might be too small. Stop looking at me like I invited you to a tupperware fight.
Storage Tips
Store it in the fridge… if there’s any left. Cold midnight leftovers? Sometimes better than fresh.
– Keep tightly covered or in an airtight container for up to 4–5 days.
– Freeze individual pieces wrapped in plastic and foil for up to 2 months; thaw in the fridge overnight unless you enjoy sad chewy textures.
Variations and Substitutions
Swap whatever you want—sugar ↔ honey, soy sauce ↔ tamari, or skip steps and call it “deconstructed.” It still counts.
– Add white chocolate chips to the brownie batter for extra melty pockets.
– Swap part of the cocoa for beet powder if you really want that red color to be extra dramatic.
– Use Greek yogurt in the cheesecake layer for a tangier, slightly lighter bite.
Frequently Asked Questions
Delish Red Velvet Cheesecake Brownies
Ingredients
Main Ingredients
- 1 cup granulated sugar
- 0.5 cup unsalted butter, melted
- 1 cup all-purpose flour
- 0.5 cup cocoa powder
- 1 teaspoon baking powder
- 0.5 teaspoon salt
- 2 large eggs
- 1 teaspoon vanilla extract
- 0.5 cup red food coloring
- 8 ounces cream cheese, softened
- 0.25 cup powdered sugar
Instructions
Preparation Steps
- Preheat your oven to 350°F (175°C). Grease a 9x13 inch baking pan.
- In a bowl, combine sugar, melted butter, and eggs. Mix well.
- Add in vanilla extract and red food coloring, mix until well combined.
- In another bowl, combine flour, cocoa powder, baking powder, and salt. Gradually mix into the wet ingredients.
- In a separate bowl, beat together the cream cheese and powdered sugar until smooth.
- Pour half of the brownie batter into the prepared pan. Spread with the cream cheese mixture, then top with the remaining brownie batter. Swirl to combine.
- Bake for 30 minutes or until a toothpick inserted comes out clean.
- Allow to cool before slicing into squares and serving.