
Delish Blackout Chocolate Cake
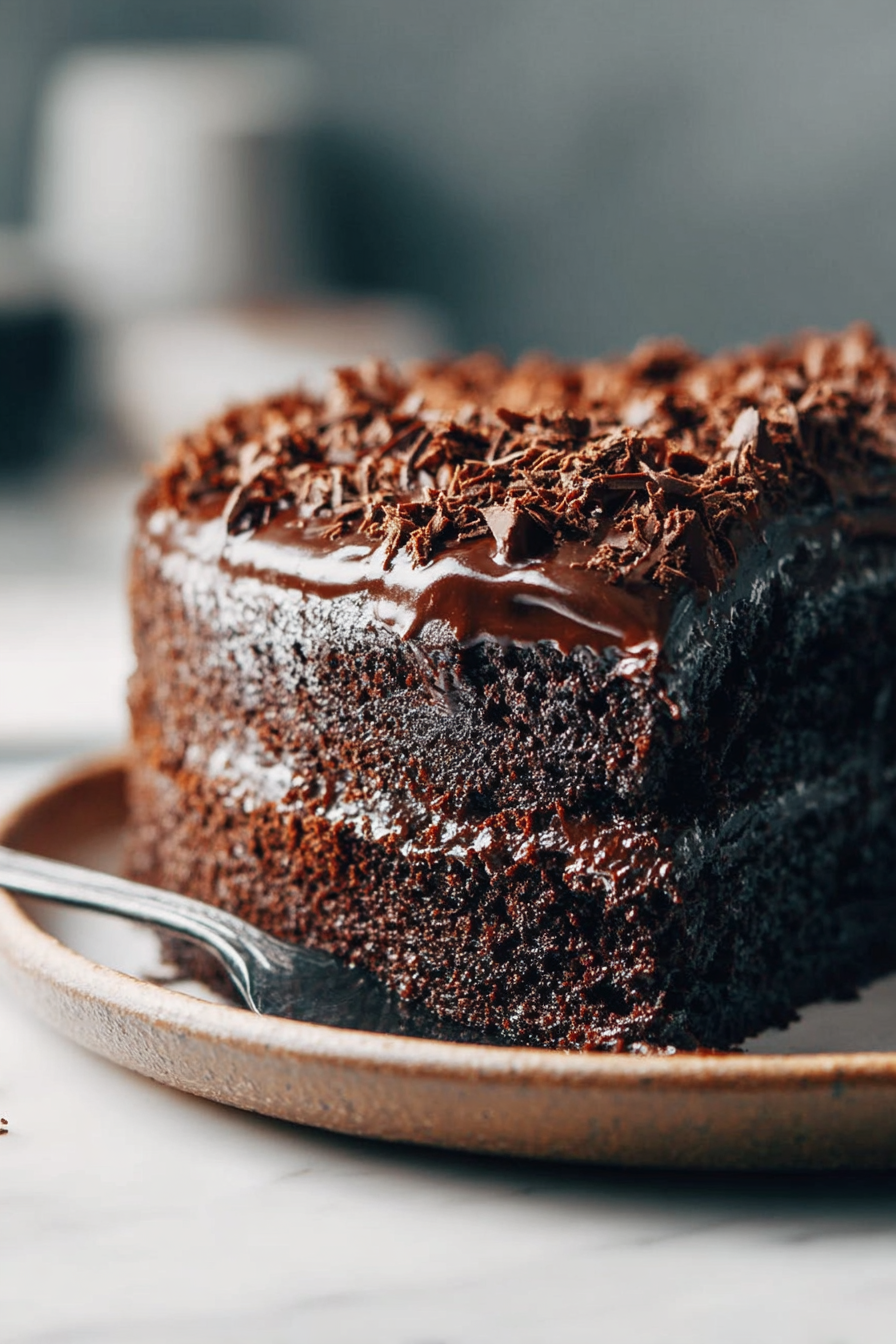
I’ll be blunt: this is the cake you make when you’ve given up pretending moderation is a thing. Deep, dark chocolate, mood-improving frosting, and enough crumbs to bury your sorrows—or your ex’s texts. I make this Delish Blackout Chocolate Cake when I need to impress people, bribe the kids into doing chores, or prove to myself that dessert can, indeed, solve approximately 37% of life’s problems. It’s rich, unapologetic, and somehow both dramatic and comforting — like a rom-com for your mouth.
Once, I tried to surprise my husband with this cake. I made the layers, frosted it like a pro (or a fictional one), and proudly carried it to the table. He opened his mouth for a bite, then took one look at the tower of chocolate and panicked—knocking his water glass into the cake like it was a modern art performance piece. The kids declared it “abstract dessert” and ate it anyway with spoons. Me? I stood in the kitchen, spatula in one hand and a dish towel in the other, philosophizing about gravity and marital maturity. Also, yes, I cried a little. Then I scraped the soggiest bits off and told everyone it was a “deconstructed blackout” and they nodded like we’d invented a trend.
MORE OF OUR FAVORITE…
Why You’ll Love This Delish Blackout Chocolate Cake
– It’s ridiculously chocolatey — like “turn down the lights, we’re wading in cocoa” chocolatey.
– Foolproof-ish: perfect for people who can follow a recipe or get creative under pressure (me, usually).
– Crowd-pleaser: brings applause, jealousy, and requests for the recipe — twice for the same person.
– Comfort-food-level decadence without needing a separate altar.
Time-Saving Hacks
– Use a stand mixer? Great. Use a whisk and stubborn optimism? Also fine. Save the mixer for when you want to look fancy.
– Buy good-quality store-bought frosting in a pinch and pretend you were going for “rustic minimalism.” Nobody will check the jar.
– Bake layers in a slightly larger pan to avoid scrambling with three pans at once. Yes, it changes the height, but fewer dishes = win.
– Freeze the cake layers ahead of time — they’re easier to slice and less likely to crumble when you’re trying to be delicate and failing.
– If you’re lazy about washing, frost directly on the serving plate and call it intentional. The crumbs add character.
Serving Ideas
– With coffee for morning meetings that should have been emails.
– With a big scoop of vanilla ice cream if you’re trying to look casual but actually trying very hard.
– Serve with wine if the kids drove you nuts, and double-service to anyone who asks about your “secret ingredient.”
– Keep it simple: one slice, fork, and no commentary required. Let the cake do the talking.
What to Serve It With
I like a bright, sharp side to cut through the richness — think tart raspberries, a sprinkle of flaky sea salt, or a few salted caramel drizzles if you’re feeling dramatic. Fresh whipped cream or espresso also work wonders. Or nothing. Sometimes nothing is the most elegant accompaniment.
Tips & Mistakes
– Don’t overmix the batter. I have. It’s sadder than you’d think.
– Use room-temperature eggs and butter unless you enjoy lumpy batter and passive-aggressive stirring.
– Let layers cool before frosting, or you’ll end up with a chocolate river and a very emotional me.
– If your frosting looks grainy, you melted the chocolate too quickly. Sigh quietly and blame the oven.
– Measure flour properly. Spoon it in and level it off unless you like dense cake with the texture of regret.
Storage Tips
Store it in the fridge… if there’s any left. Cold midnight leftovers? Sometimes better than fresh.
– Wrap slices well to prevent fridge odors from joining the party.
– Freeze individual slices for emergency dessert situations — they thaw nicely in a few hours.
– Let chilled slices sit 15–20 minutes before serving so they lose the “I just survived Antarctica” vibe.
Variations and Substitutions
Swap whatever you want—sugar ↔ honey, soy sauce ↔ tamari, or skip steps and call it “deconstructed.” It still counts. Add espresso powder for depth, orange zest for a citrus flirtation, or a handful of toasted nuts for texture and faux sophistication. Gluten-free? Use a 1:1 GF blend. Dairy-free? Try coconut cream in the frosting. Adapt boldly and blame me later.
Frequently Asked Questions
Delish Blackout Chocolate Cake
Ingredients
Main Ingredients
- 1.5 cups all-purpose flour
- 0.75 cups unsweetened cocoa powder
- 1 cup granulated sugar
- 0.5 cups butter softened
- 2 large eggs
- 1 cup milk
Instructions
Preparation Steps
- Preheat your oven to 350°F (175°C). Grease and flour a 9x13 inch baking pan.
- In a large mixing bowl, combine flour, cocoa powder, and sugar. Mix well.
- Add softened butter, eggs, and milk to the bowl. Beat with an electric mixer for 2 minutes.
- Pour the batter into the prepared pan and smooth the top with a spatula.
- Bake in the preheated oven for 30 minutes or until a toothpick inserted into the center comes out clean.
- Let the cake cool before serving. Enjoy your Delish Blackout Chocolate Cake!