
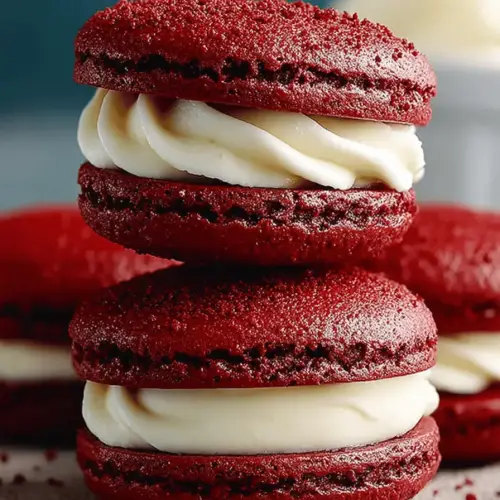
Red Velvet Whoopie Pies
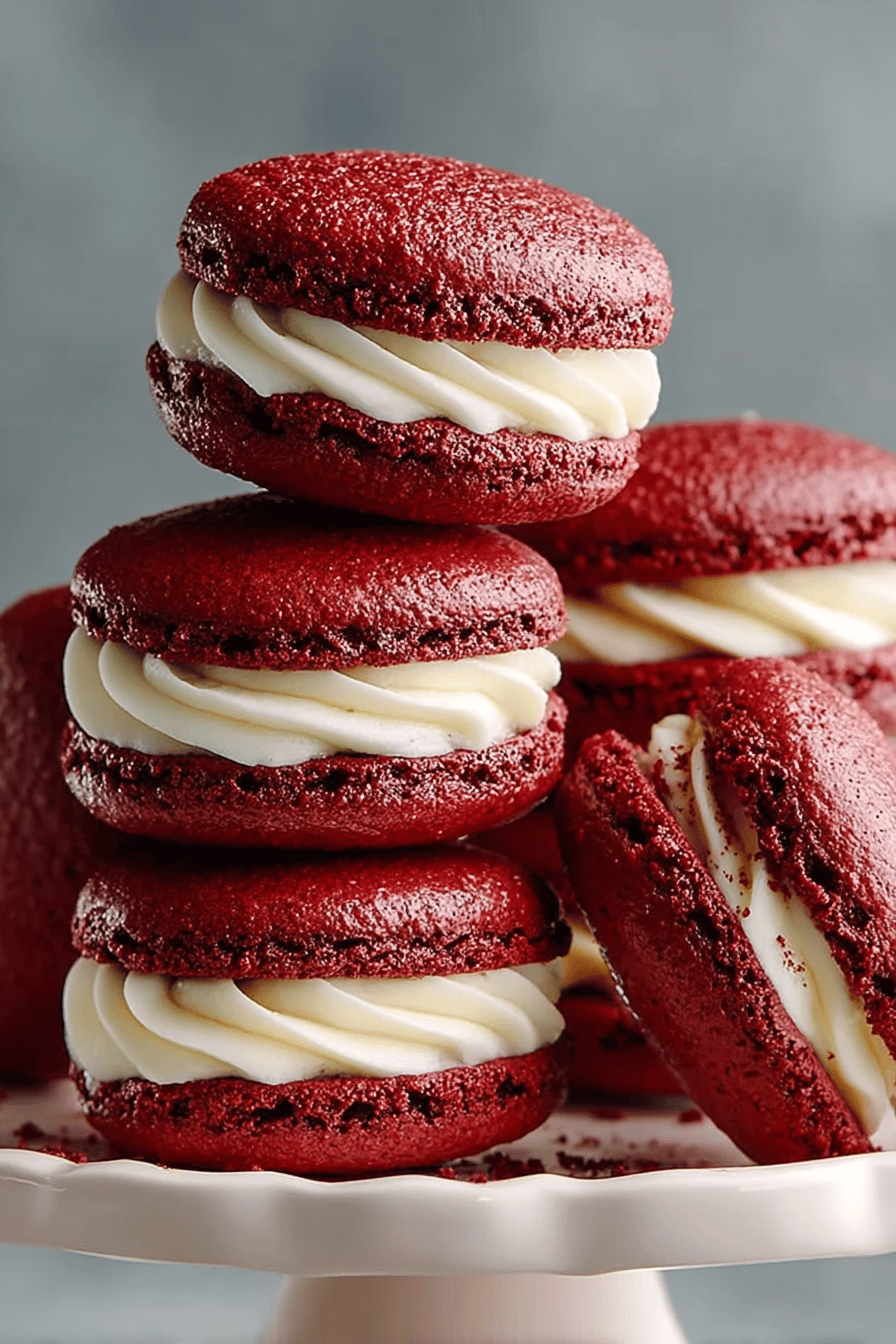
Alright, folks, gather ‘round the kitchen table ‘cause I’ve got a treat for you that’s sweeter than a game-winning touchdown on Thanksgiving. Today, we’re diving into the world of Red Velvet Whoopie Pies. Think about a soft and fluffy marriage of cake and cookie, smothered with luscious cream cheese filling. Seriously, these little guys are like cupcakes in disguise, and they never fail to set the dessert bar high.
In our house, these whoopie pies have become a bit of a legend. My husband swears they’re his spirit animal in food form — slightly messy but oh-so-decadent. Our taste testers (aka the kids) will line up like it’s the start of a parade every time I bake a batch. My favorite memory? Making a batch when we were snowed in one winter. Turns out, they’re basically fuel for fort-building and floor-picnic-having. They’ve just wormed their way into our family lore.
MORE OF OUR FAVORITE…
Why You’ll Love This Red Velvet Whoopie Pies
1. They’re basically happiness sandwiched between fluffy red hugs.
2. The cream cheese filling will bewitch your life. Seriously, it’s that good.
3. You can whip these up when you’re feeling extra and want to impress without a lot of fuss.
4. Moist meets fluffy, and that’s always a winning combo in my book.
How to Make It
Okay, picture this: you’re standing in your kitchen, looking like a masterpiece in your flour-dusted apron. Grab your mixing bowl and get ready to make some magic, or a mess. Either way, it’s going to be great. So, you start by mixing up the dry stuff – flour, cocoa, baking soda, and such – and pretend you’re doing some sort of science experiment. It’s satisfying, trust me.
Then move over and beat the heck out of some butter and sugar like it owes you money. Cream that mixture ‘til it’s smoother than your favorite rom-com. Add in the eggs, vanilla, and that iconic red food coloring that makes these pies the drama queens they truly are. Combine everything with the dry mix — don’t panic if it gets thick. Baking’s only a little like math, right?
Scoop dollops onto your baking trays. Seriously, go big — who likes small pies anyway? While they bake, try not to eat all the filling straight from the bowl. It’s hard, I know. Assemble those beauties when they’ve cooled, and there you have it — little clouds of red velvet happiness.
Ingredient Notes
– **All-purpose flour**: This is the backbone, folks, the thing that holds it all together. I’ve tried different flours in a pinch. Results were… interesting.
– **Cocoa powder**: Adds that nice, rich punch. Trust me, let it bloom with the wet ingredients.
– **Red food coloring**: Okay, so forget the teaspoon. Just go wild. It’s a party in pie form.
Recipe Steps:
1. Preheat oven and line baking sheets with parchment paper.
2. Mix your dry ingredients together in a bowl.
3. Cream the butter and sugar until fluffy, switching to a bigger bowl if it’s taking over.
4. Beat in eggs, vanilla, and all the red coloring your heart desires.
5. Combine everything, channeling your inner Zen master.
6. Scoop dough onto trays and bake until firm and fluffy.
7. Cool completely and fill with generous amounts of cream cheese frosting.
What to Serve It With
Tips & Mistakes
1. The fridge is your friend when it comes to storing these pies. They also make for one chill morning treat with coffee if you happen to eat them for breakfast (no judgment).
Storage Tips
Keep those whoopie pies in an airtight container in the fridge. Eat them cold if you like a denser experience — gosh, they’re a bit of heaven with your morning joe. If you’re on the last pie and it doesn’t make it to the fridge, no worries. Some things are just meant to be.
Variations and Substitutions
Swap brown sugar for regular sugar if you like a caramel kick. Let’s be honest, though: I once ran out of cocoa powder and improvised with crushed Oreos. Not a quintessential red velvet taste, but hey, we got through it.
Frequently Asked Questions
Red Velvet Whoopie Pies
Ingredients
Main Ingredients
- 2.5 cups all-purpose flour
- 0.75 cup unsweetened cocoa powder
- 1.5 cups granulated sugar
- 1 teaspoon baking soda
- 0.5 teaspoon salt
- 1 cup buttermilk room temperature
- 0.5 cup vegetable oil
- 2 large eggs room temperature
- 1 tablespoon red food coloring
- 1 teaspoon vanilla extract
- 1 teaspoon white vinegar
Filling
- 1 cup unsalted butter softened
- 4 cups powdered sugar
- 1 teaspoon vanilla extract
- 4 tablespoons heavy cream
Instructions
Preparation Steps
- Preheat the oven to 350°F (175°C). Line two baking sheets with parchment paper.
- In a large bowl, sift together the flour, cocoa powder, baking soda, and salt.
- In another bowl, whisk the buttermilk, vegetable oil, eggs, red food coloring, vanilla extract, and vinegar until combined.
- Gradually add the wet ingredients to the dry ingredients and mix until smooth.
- Drop tablespoon-sized scoops of batter onto the prepared baking sheets, spacing about 2 inches apart.
- Bake for 12-15 minutes until the edges are set and a toothpick inserted comes out clean. Allow to cool completely on a wire rack.
- For the filling, beat the softened butter until creamy. Gradually add powdered sugar, then vanilla extract and heavy cream. Beat until fluffy.
- Spread or pipe the frosting onto the flat side of half the cakes and sandwich with the remaining cakes.
- Serve immediately or refrigerate until ready to serve.