
Jam Thumbprint Cookies
Oh, hey there! Gather ’round my kitchen island, because I’ve got the coziest little recipe to share with you: Jam Thumbprint Cookies. These are the delightful love-children of buttery, tender cookies, and luscious, gooey jam. They’re like a sweet hug from Grandma in cookie form, and you seriously need them in your life. Why? Because they’re simple to make, soul-warmingly tasty, and perfect for any occasion where you want your tastebuds to dance for joy.
Okay, real talk… these cookies have become a legend in my house. My husband, bless him, is downright obsessed with these little morsels of happiness. It was one of those Sundays — you know, the lazy kind where the laundry is quietly multiplying in the corner, and we need something to brighten the impending Monday doom. Well, I whipped up a batch of these Jam Thumbprint Cookies, and they vanished faster than socks in a dryer. Ever since, they’ve been our go-to for every game night, movie marathon, and cozy afternoon snack.
MORE OF OUR FAVORITE…
Why You’ll Love This Jam Thumbprint Cookies
– Honestly? They’re like little jam-filled belly hugs, and who doesn’t want that?
– Simple enough to whip up on a whim. No fancy gadgets or prayer circles needed.
– Perfectly sized to stuff in your mouth like popcorn at a movie. No judgment.
– The ingredients are basically pantry whispers, telling you: “We’re already here!”
How to Make It
So, let’s just dive in—I like to think of this process as cookie chaos with purpose. Start by letting some butter and sugar get cozy in a bowl until they’re super fluffy, like a cloud of sweetness. Then, you mix in the flour until you’ve got a dough that just begs to be messed with. Roll this dreamy dough into little balls that are basically begging for a thumb thump—hence the ‘thumbprint.’ Now, if you’re anything like me, you’ll have your favorite jams lined up like they’re auditioning for a delicious talent show. Spoon those jams into the thumb dents with reckless abandon. Bake them, and let the smell of happiness take over your kitchen. Ta-daa!
Ingredient Notes
– Butter: The hero of our dough. Don’t be shy with it but make sure it’s room temp, or it’ll refuse to play nice.
– Sugar: The sweet siren of our cookies! I once tried using less and it tasted like it was holding a grudge.
– Flour: Makes everything hold together. I’ve mismeasured flour when the kids were distracting me, but if you go by texture, you’ll know when it’s just right.
1. Preheat oven. Prepare baking sheets. Get them cozy.
2. Cream butter and sugar in a bowl until fluffy.
3. Add flour to create cookie dough.
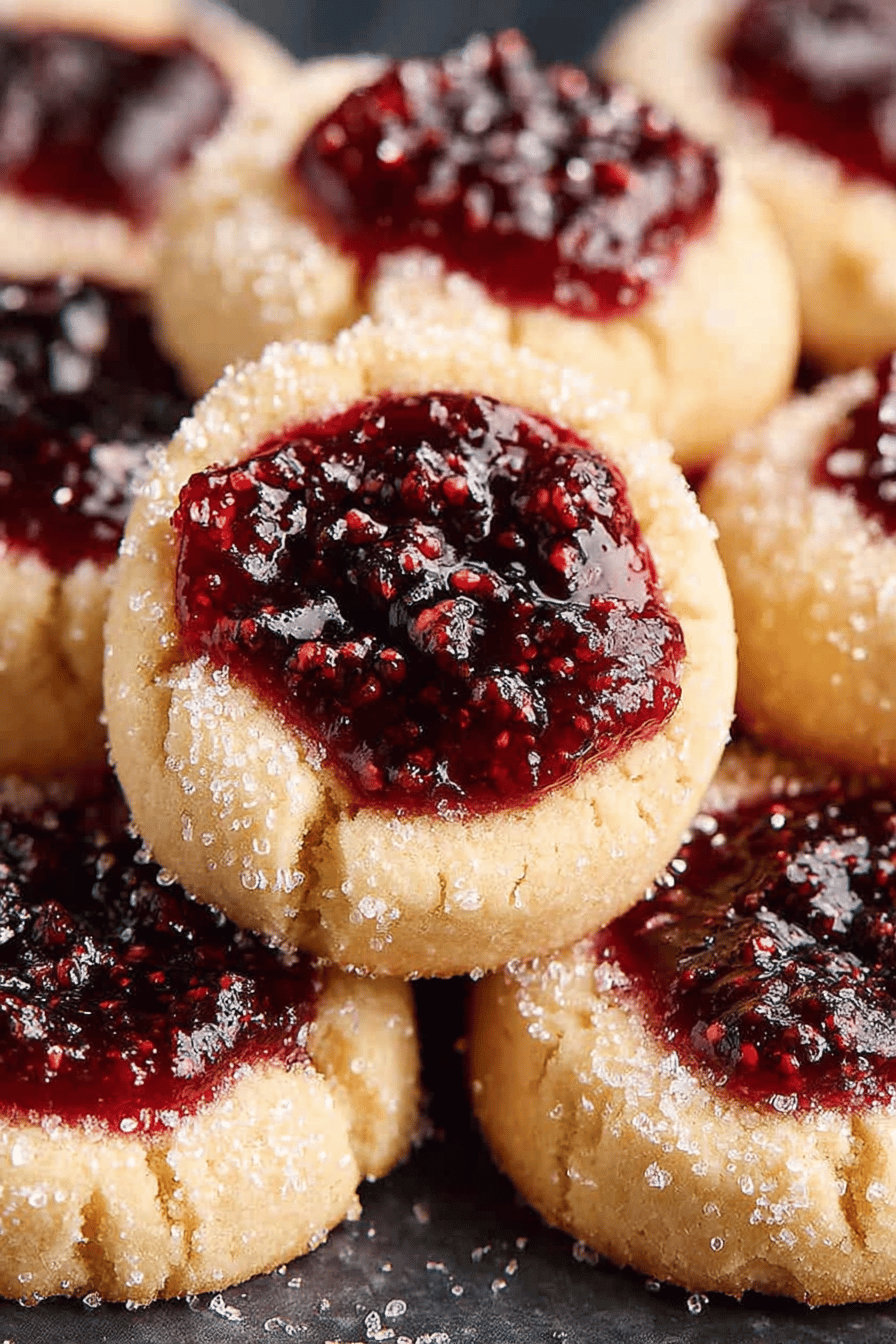
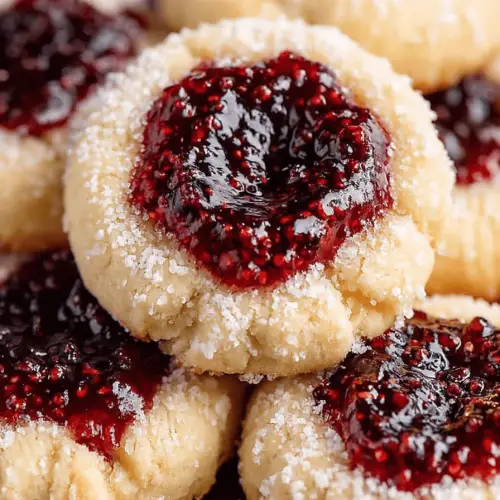
4. Roll into balls, press thumb in the middle to make a “thumbprint.”
5. Spoon your favorite jam into each little “thumbprint.”
6. Bake them until they smell so divine you can’t resist!
What to Serve It With
Tips & Mistakes
Storage Tips
Alright, so you’ve nailed the baking. Now for what’s next. Store these beauties in an airtight container, and they’ll stay fresh like they just rolled out of the oven for a few days. If they last that long! Eating them cold is like a chilly but delightful slap to your senses. I’ve even eaten them for breakfast—because life is short, right?
Variations and Substitutions
You know how it goes, sometimes you’re bound by the contents of your fridge. Swap that sugar for honey or maple syrup if you need to, the world won’t end. And if you’re out of jam, well, I’ve shamelessly used peanut butter once, and the results were worth every uncertain moment.
Frequently Asked Questions
Jam Thumbprint Cookies
Ingredients
Main Ingredients
- 1.5 cups all-purpose flour
- 0.5 cup unsalted butter softened
- 0.5 cup granulated sugar
- 1 tsp vanilla extract
- 0.25 tsp salt
- 0.33 cup raspberry jam
Instructions
Preparation Steps
- Preheat oven to 350°F (175°C). Line a baking sheet with parchment paper.
- In a bowl, cream together the softened butter and granulated sugar until light and fluffy.
- Add vanilla extract and mix well.
- Gradually add all-purpose flour and salt, mixing until dough forms.
- Roll dough into 1-inch balls and place on prepared baking sheet.
- Make an indentation in the center of each ball using your thumb.
- Fill each indentation with raspberry jam.
- Bake for 12-15 minutes or until edges are lightly golden.
- Let cookies cool on baking sheet for 5 minutes before transferring to wire rack to cool completely.