
Irresistible Oreo Dessert Recipes to Satisfy Your Sweet Tooth
Oreo desserts have taken the culinary world by storm, and for good reason—they combine that beloved cream-filled chocolatey goodness with endless dessert possibilities. If you’re searching for a mouthwatering way to indulge your sweet tooth, our carefully crafted recipes will surely hit the spot. These treats not only satisfy cravings but are also super easy to whip up, making them perfect for any occasion. Dive into a world where the iconic Oreo shines in new, exciting ways in your favorite desserts.
The first time I made an Oreo-based dessert, it was during a family gathering over the holidays. We needed something simple yet delicious to wow everyone, and the Oreo recipe did just that. It was an instant hit, vanishing from the dessert table in minutes. My family still talks about that day, and it has since become a staple for all our gatherings. Its quick preparation and delightful taste became the reason everyone anticipated our seasonal get-togethers.
MORE OF OUR FAVORITE…
Why You’ll Love This Recipe
Our Oreo dessert recipe holds a special place in many hearts for a few unique reasons:
- Effortless to prepare: Perfect for beginners and busy cooks alike, requiring only a handful of ingredients.
- Versatile: It can be tailored for different audiences by adding twists to suit taste preferences.
- Fun to make: This is a great activity to involve family or friends in the kitchen.
- No-bake option: On hot days or when you’re short on time, opt for the no-bake version without losing any of the decadent flavor.
Ingredients Notes
Choosing the right components can make or break the dessert experience. Here’s what you need to know:
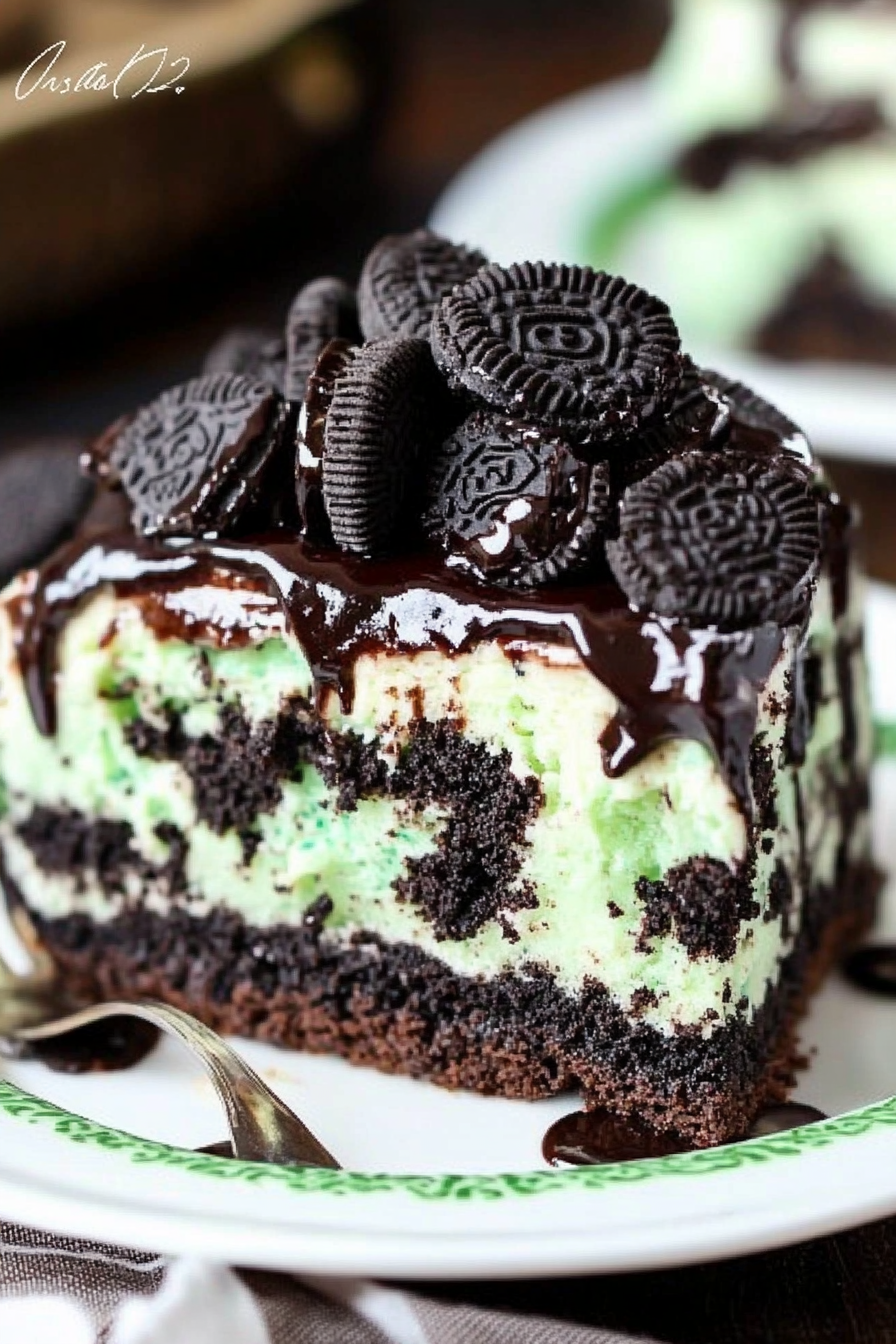
- Oreos: Use classic Oreos for that authentic taste, but feel free to experiment with different flavors like mint or golden Oreos.
- Cream Cheese: Opt for full-fat cream cheese to ensure the richest flavor and texture. Be sure to soften it at room temperature for easier mixing.
- Whipped Cream: Homemade whipped cream will elevate the dish, but store-bought works when you’re short on time.
Recipe Steps
Step 1
Crush the Oreos: Begin by crushing the Oreos to form fine crumbs. You can use a food processor or place them in a plastic bag and crush with a rolling pin.
Step 2
Prepare the base: Mix the crushed Oreos with melted butter to create a crumbly mixture. Press this into a greased baking dish to form the crust.
Step 3
Mix the filling: In a mixing bowl, beat the cream cheese until smooth. Fold in sugar and vanilla extract, then gently incorporate the whipped cream for a lighter texture.
Step 4
Assemble: Spread the cream cheese mixture evenly over the Oreo crust. Top with a layer of Oreo crumbs for added texture and flavor.
Step 5
Chill and serve: Refrigerate for at least 2 hours or until the dessert has set. Serve chilled for the best taste experience.
Storage Options
Proper storage will ensure your Oreo dessert maintains its scrumptious taste for days. Store leftovers in an airtight container in the refrigerator for up to 4 days. If you plan to freeze, wrap the dessert tightly in plastic wrap and aluminum foil to protect against freezer burn. Thaw in the refrigerator overnight before serving. Avoid reheating as it may compromise the structure and texture.
Variations & Substitutions
For those with dietary restrictions or looking to experiment, here are some exciting variations:
- Make it vegan by substituting the cream cheese and whipped cream with plant-based alternatives.
- For a gluten-free option, use gluten-free Oreo cookies now available in most grocery stores.
- Add fruits like strawberries or raspberries as a topping for a fresh twist.
- Experiment with flavored Oreos for a customized taste adventure.
Frequently Asked Questions
Can I use a food processor for the entire recipe?
Yes, a food processor is ideal for crushing the Oreos and mixing some ingredients. Just ensure not to over-process the filling; you want a smooth and creamy consistency.
How can I make this dessert ahead of time?
Prepare the dessert a day before and store it in the refrigerator. This allows the flavors to develop and the dessert to set properly, enhancing its overall taste.
What can I do if my base is too crumbly?
If you find the crust too crumbly, mix in an additional tablespoon of melted butter. This should help bind the crumbs together for a better texture.
Frequently Asked Questions

Irresistible Oreo Dessert Recipes to Satisfy Your Sweet Tooth
Ingredients
Main Ingredients
- 24 cookies Oreo cookies crushed
- 8 oz cream cheese softened
- 1 cup sugar granulated
- 2 cups whipped topping thawed
Instructions
Preparation Steps
- In a large mixing bowl, beat cream cheese and sugar until smooth.
- Fold in whipped topping until just combined.
- Gently stir in crushed Oreo cookies.
- Spread mixture into a 9x13 inch pan and refrigerate for at least 1 hour before serving.