
Dairy Queen Copycat Cake
Hey, if you’ve ever found yourself dreaming about those oh-so-perfect cakes from Dairy Queen, then buckle up! You’re about to embark on a homemade adventure to create that iconic ice cream cake right in your own kitchen. It’s special because you don’t have to shell out the cash at Dairy Queen for just a taste of that cool creamy goodness. Make it for birthdays, make it for parties, make it for a Tuesday—I don’t care. It’s pure, icy bliss no matter what!
I made this for my husband and our gaggle of kiddos one sweltering summer afternoon, and folks, it was a hit. Let’s just say, the kids didn’t stop raving about it, and the husband, bless his heart, even licked his plate clean. This recipe has turned into a yearly tradition, and if you’ve got kids, or if you’re just a kid at heart like we are, it’s a game-changer.
MORE OF OUR FAVORITE…
Why You’ll Love This Dairy Queen Copycat Cake
– Feel free to brag about making an ice cream cake from scratch; it’s both humbling and a wicked power move.
– No driving, no lines, no small talk with the cashier; just straight-up chill dessert action.
– Equal parts of nostalgia and deliciousness wrapped up in one icy package.
How to Make It
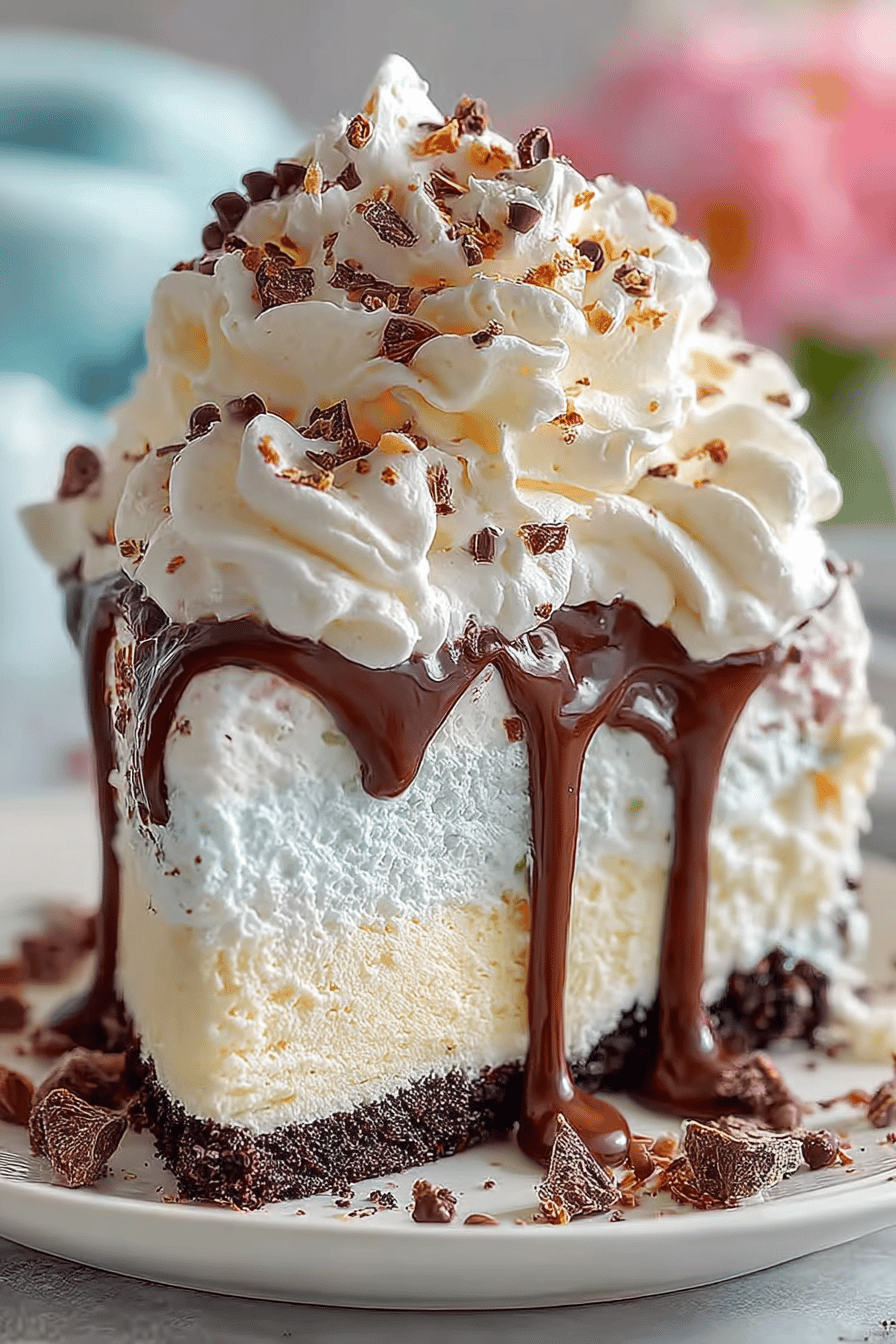
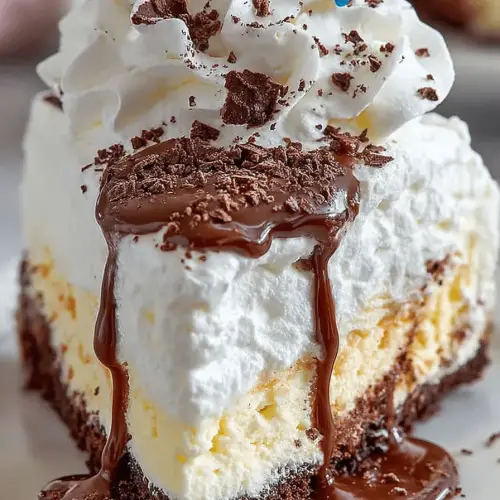
Alrighty, grab your favorite spatula and let’s get messy. First thing first, grab two flavors of ice cream. You know those yummy layers at Dairy Queen? You’ll need to soften each for a bit to make them spreadable. Like, not melted, but enough so you can push them around without getting a forearm workout. Scoop one flavor into your springform pan, then pop it into the freezer to harden. Time well spent catching up on emails!
Don’t forget the middle section—the chocolate and crunchy goodness! Melt some good ol’ hot fudge—yum! Throw some Oreos into a bag and give them a good smash. Mix those crumbles into the fudge and layer them over your first ice cream. Not even going to lie, sometimes I make extra for snacking while assembling everything.
Bring in the second ice cream flavor, smooth it on top, and back into the freezer it goes. A few hours will do, or make it overnight if you’re a hardcore planner. Finish with a classic whipped cream layer. There it is, a little masterpiece.
Ingredient Notes
– Ice Cream: Pick your favorites, kid you not, you could use mint, vanilla, coffee…live your truth.
– Oreos: Really get in there with the smashing! Release some stress! If they’re not chunky enough, the magic in the middle loses its crunch.
– Hot Fudge: Go ahead, buy the store-bought kind because haha, time is money.
1. Soften and spread the first flavor of ice cream in a cake pan.
2. Freeze that layer until it’s firm.
3. Mix crushed Oreos with melted hot fudge and layer over.
4. Spread the second flavor of softened ice cream on top.
5. Freeze again until very firm.
6. Finish with a layer of whipped cream, freeze until set.
What to Serve It With
Tips & Mistakes
Storage Tips
You’re going to want to keep it in the freezer, obviously. Slices keep well if wrapped individually, so you can swoop into the freezer and grab a piece whenever you get a hankering. Eating it cold for breakfast? No judgment here—it has dairy; that’s breakfasty, right?
Variations and Substitutions
Want to play around? Swap those cookies for any other kind of cookie crumb you love or try caramel sauce instead of fudge for a twist. Once, I even threw in peanut butter cups because, honestly, why not? Go nuts! Literally, throw some nuts in there if you want some crunch. No biggie if you forget a layer; just call it a creative reinterpretation.
Frequently Asked Questions
Dairy Queen Copycat Cake
Ingredients
Main Ingredients
- 1.5 cups all-purpose flour
- 1 cup sugar
- 0.5 cup unsweetened cocoa powder natural or Dutch-processed
- 1 teaspoon baking powder
- 0.5 teaspoon baking soda
- 0.5 teaspoon salt
- 1 cup buttermilk room temperature
- 0.5 cup vegetable oil
- 2 large eggs room temperature
- 1 teaspoon vanilla extract
- 0.5 cup hot water freshly boiled
Fudge Frosting
- 1 cup unsalted butter softened
- 3 cups powdered sugar
- 0.75 cup unsweetened cocoa powder
- 0.5 cup heavy cream
- 1 teaspoon vanilla extract
- pinch salt optional
Instructions
Preparation Steps
- Preheat the oven to 350°F (175°C). Grease and flour two 9-inch cake pans.
- In a large bowl, whisk together flour, sugar, cocoa powder, baking powder, baking soda, and salt.
- Add buttermilk, vegetable oil, eggs, and vanilla extract to the dry ingredients; mix until smooth.
- Stir in hot water carefully until the batter is well combined and thin.
- Divide the batter evenly between the prepared pans and bake for 30-35 minutes or until a toothpick inserted into the centers comes out clean.
- Allow cakes to cool in pans for 10 minutes, then turn out onto wire racks to cool completely.
- Make the fudge frosting by beating butter until creamy. Gradually add powdered sugar and cocoa powder, alternating with heavy cream and vanilla extract, and beat until smooth.
- Frost the cooled cakes with the fudge frosting, layering and covering the sides evenly.
- Refrigerate the cake for at least 30 minutes before serving for best texture.