
Butterfinger Delish
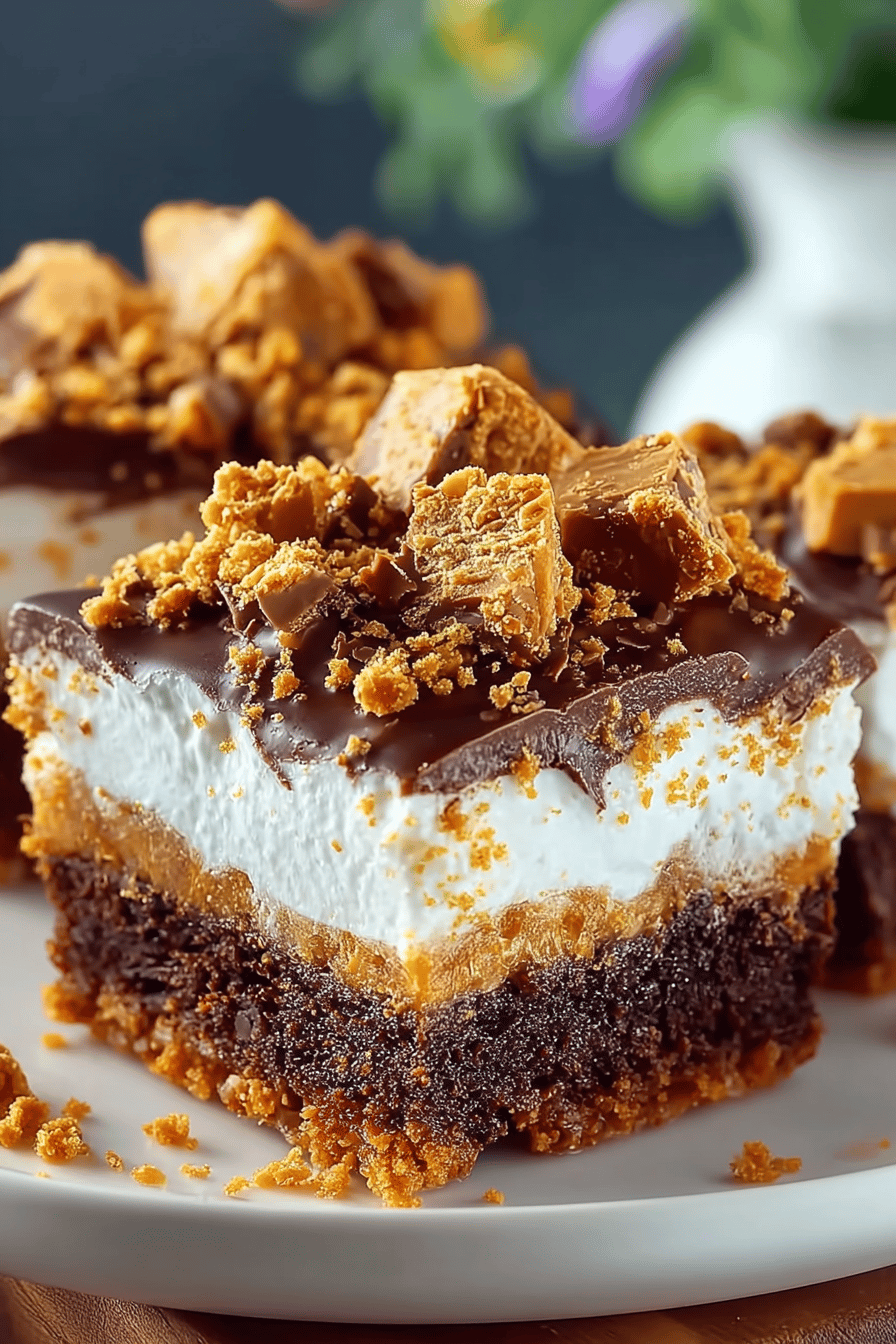
The Butterfinger Delish is that kinda recipe that feels like a warm, indulgent hug from the universe. Imagine decadent layers of chocolate and peanut butter — it gives you movie night at home vibes with a smack of nostalgia. If you haven’t tried it yet, you’re missing out on the kind of treat that’s devilishly habit-forming. Seriously, it’s the sort of thing you didn’t know you needed, but once you dig in, you’ll find yourself coming back for more… probably while wearing PJs.
I stumbled upon this recipe on a particularly gloomy day when my husband and I needed something sweet to munch on. It was one of those perfect accidental discoveries – like finding a twenty-dollar bill in an old coat pocket. Now, it’s a household favorite. My husband practically dances whenever I make it, which says a lot because he hates dancing! Our little family in absolute chaos adores every messy moment of whipping this up together. Somehow, it always turns things around — from bad days to birthday nights, it’s our trusty sweet sidekick.
MORE OF OUR FAVORITE…
Why You’ll Love This Butterfinger Delish
– It’s got that perfect crunchy-creamy thing going on — total happy mouth vibes.
– Using simple pantry staples, I dare say… gloriously sweet tooth-friendly!
– Zero-fuss recipe. You’ll feel like a culinary genius, even if your kitchen looks like a chocolate explosion happened. (And hasn’t that dreamt at least once?)
– It’s a perfect “Oops, the family’s here!” dessert that saves the day — like a superhero in a cake pan.
How to Make It
So, pretty much you just want to grab some sort of pan (the one you find first in the drawer usually works best), and start your baking adventure. No need to aim for perfection because we all know that’s a unicorn. Seriously, just throw it together — mix your chocolate and butter with reckless love, let it melt down into a gooey mess of wonderment. While that’s happening, make sure your peanut butter is at the ready and go ahead and sneak a taste. You deserve it. Smash those Butterfingers! Yeah, it’ll make a bit of noise. But it’s worth it, I promise when it’s all mixed and baked to perfection, your taste buds will thank you.
Ingredient Notes
– Chocolate Chips: My little pieces of joy! Melt these with some flair. Accidental oven-hot fingers can’t be helped.
– Peanut Butter: Go smooth or chunky, depending on your mess tolerance. Just avoid the natural stuff here unless you’re ready to eat with a spoon.
– Butterfingers: Smash them to bits! Rage-baking perks. If the pieces vary in size, don’t sweat it. Extra crunch never hurt anyone.
Recipe Steps
1. Preheat your oven to 350°F.
2. Melt chocolate chips and peanut butter together in a saucepan.
3. Crush Butterfingers and mix them into your chocolate mixture.
4. Pour into a pan like it owes you money.
5. Bake for 25 minutes, or until the middle is set.
6. Let it cool if you can wait that long, then slice and indulge.
What to Serve It With
Tips & Mistakes
Storage Tips
Got leftovers? (Unlikely, but just in case.) Store them in a tin or tuck them in an airtight container. Toss ’em in the fridge if you like a firmer vibe, but I dare you to try them cold. It’s like eating a sweet piece of candy in cake form. And, oh, for breakfast? I won’t tell if you don’t.
Variations and Substitutions
There’s some wiggle room here if you’re feeling adventurous. Got no chocolate chips? Try using any leftover bits of Halloween candy. Out of Butterfingers? Any nutty candy bar will do the trick. I once subbed in a bar of nougat and it was heavenly chaos. Just work with what you’ve got and trust the process… hopefully.
Frequently Asked Questions
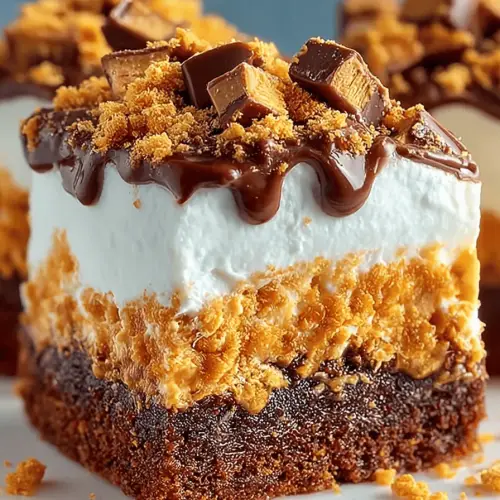
Butterfinger Delish
Ingredients
Main Ingredients
- 2 cups chopped Butterfinger candy bars
- 1.5 cups cream cheese softened
- 1 cup powdered sugar
- 0.75 cup peanut butter smooth
- 2 cups milk chocolate chips for melting
Instructions
Preparation Steps
- In a large bowl, beat the softened cream cheese and peanut butter together until smooth.
- Gradually add powdered sugar and mix until fully incorporated.
- Fold in chopped Butterfinger candy bars gently.
- Melt the milk chocolate chips in a microwave-safe bowl in 30-second intervals, stirring after each until smooth.
- Spread the mixture into a lined pan and pour melted chocolate on top, smoothing with a spatula.
- Refrigerate for at least 2 hours before serving to allow it to set.