
Peanut Butter Revel Bars
Alright, friends, gather ’round for a treat that tastes like pure comfort and nostalgia had a delicious baby. We’re diving into Peanut Butter Revel Bars today, and oh boy, these are NOT your average snack. Imagine peanut butter meeting oats, then having a chocolatey, gooey reunion in the middle. They’re the kind of bars you make when you need a hug in dessert form. Perfect for those days when you’re craving something sweet but want a little texture revolution in your mouth.
Let me paint you a picture. My husband (let’s call him the ultimate snack whisperer) loves these bars so much, he practically begs for them every weekend. So they’ve become as much a Saturday tradition as our overly ambitious home-improvement plans that never happen. Once, I tried baking them without the main scoop of love (read: peanut butter), and let’s just say, it was a whole lesson in never skipping the good stuff. These goodies are like our house band, always on cue to play whenever we need a pick-me-up.
MORE OF OUR FAVORITE…
Why You’ll Love This Peanut Butter Revel Bars
Okay, here are some reasons you’ll fall head-over-heels for these bars:
– They send your taste buds on a wild ride with layers of flavor and texture.
– They require zero fancy skills — if I can do it while caught up in a podcast, you can too!
– The memory of the smell makes you warm inside long after the last crumb is devoured.
How to Make It
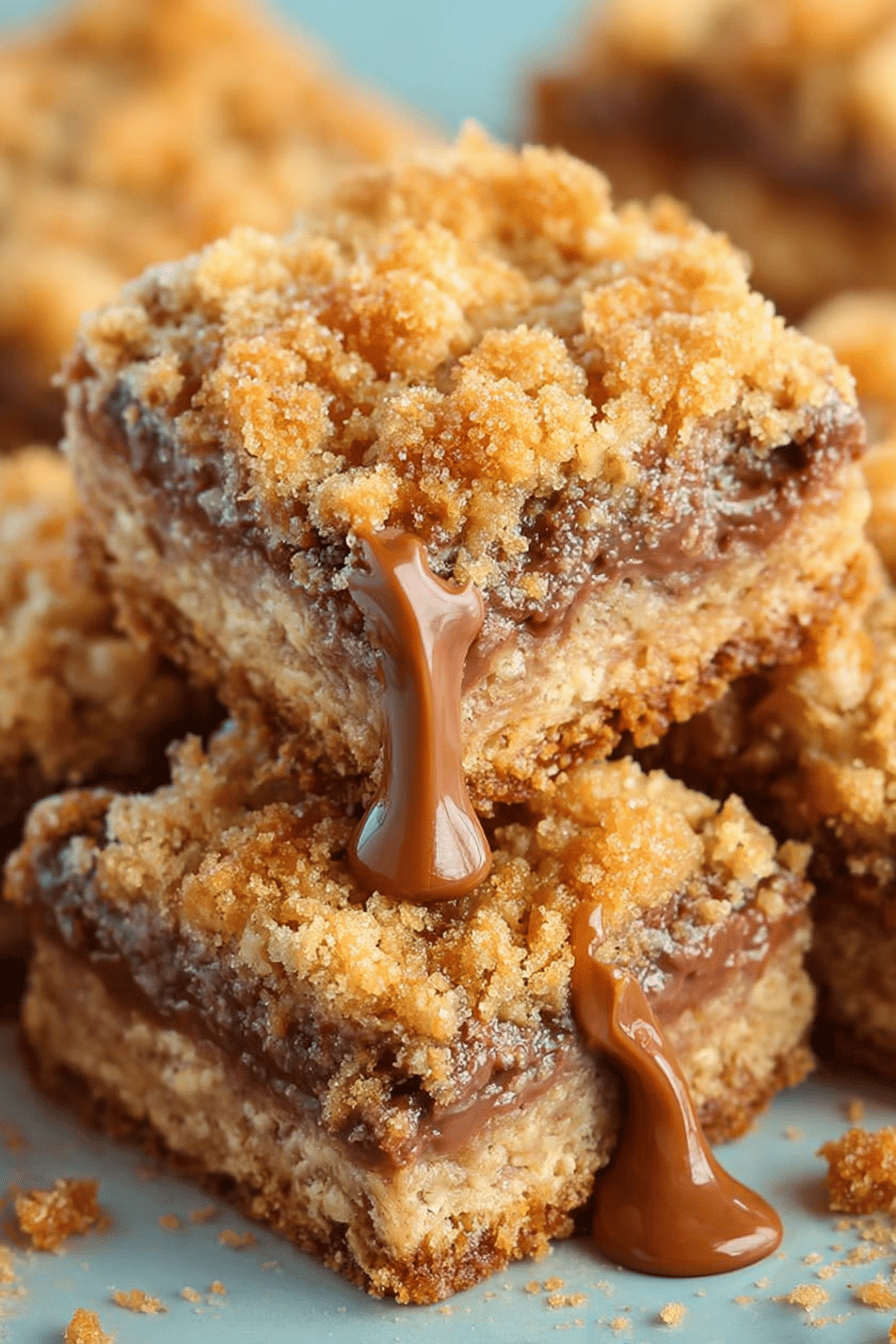
Alright, let’s chat. First, you’ll want to line up all your ingredients like a rowdy tiny orchestra, because we’re diving in without a dry run here. Grab that big ol’ bowl and mix up your oats and peanut butter until they’re best friends. You know you’ve done it right when the spoon gets sticky just watching. Then, we sneak in some chocolate chip treasures — go ahead, sneak a couple, you deserve it.
When that’s all cozy, you’ll spread half this sticky situation into a baking dish. Melt some chocolate chips with peanut butter to create this silky mix that’s just pure magic and spread it over your base. Top things off with the remaining oat mix, channeling your inner artist (more like scribbling over a doodle than painting a masterpiece). Pop it in the oven and pace impatiently while drooling like it’s your new cardio.
Ingredient Notes
– Peanut Butter: This is the MVP. Go for creamy, cause it hugs everything into one lovely bar.
– Chocolate Chips: More of a personal philosophy than an ingredient. Never too much.
– Oats: Roll ‘em up, roll ‘em down. They’re the mess makers that hold it all together.
Recipe Steps:
1. Mix oats and peanut butter until gloriously combined.
2. Spread half of the sticky goodness into a baking dish.
3. Melt chocolate chips and peanut butter together.
4. Pour the melted mixture over the base layer.
5. Add the remaining oat mixture on top like Picasso with oats.
6. Bake until you can’t handle the wonderful aroma anymore.
What to Serve It With
Tips & Mistakes
Keep a close watch on that chocolate. Don’t let it scorch! Also, more chocolate than called for is never the wrong answer.
Storage Tips
If you’ve got leftovers (doubtful!), store them in an airtight container. Trust me, they’ll call your name for a mid-morning snack or even a cheeky breakfast treat. Cold, they’re like chewy candy-bars; perfect for guilt-free morning indulgence.
Variations and Substitutions
Confession: I’ve swapped half the peanut butter for almond butter once—when the jar only had spoon remnants remaining. Y’all, it was as good as a happy accident gets. You could also try honey instead of sugar when you’re feeling adventurous (or out of one shelf staple).
Frequently Asked Questions
Peanut Butter Revel Bars
Ingredients
Main Ingredients
- 1.5 cups all-purpose flour
- 0.75 cups granulated sugar
- 0.5 cups unsalted butter melted
- 1 cup creamy peanut butter
- 1 cup powdered sugar
- 0.25 cups milk
- 1 cup semi-sweet chocolate chips
Instructions
Preparation Steps
- Preheat oven to 350°F (175°C). Grease and flour a 9x13 inch baking pan.
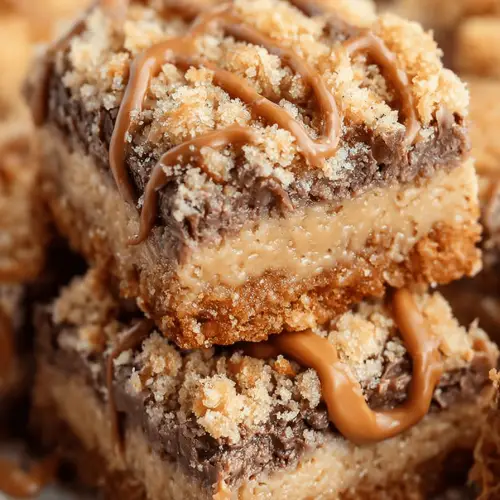
- In a medium bowl, mix the flour, sugar, and melted butter until crumbly. Press half of this mixture into the bottom of the prepared pan.
- In another bowl, combine peanut butter, powdered sugar, and milk until smooth. Spread this mixture evenly over the crust layer.
- Sprinkle the remaining crumb mixture on top, then bake for 20-25 minutes or until golden brown.
- Remove from oven and immediately sprinkle chocolate chips on top. Let sit for 5 minutes to melt, then spread evenly over bars.
- Allow bars to cool completely before cutting into squares. Serve and enjoy!