
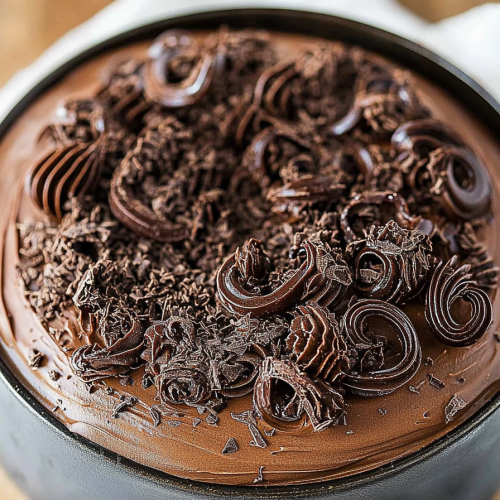
How to Create Chocolate Curls: A Step-by-Step Guide

Creating chocolate curls at home might seem daunting, but it’s simpler than you think and a sure way to impress your guests. Whether you’re topping a cake, embellishing your cupcakes, or adding that special touch to a decadent dessert, learning how to make chocolate curls can transform any sweet treat into a work of art.
I remember the first time I attempted to make chocolate curls with my grandmother. We were preparing a cake for my sister’s birthday, and she insisted on decorating it in the most elaborate fashion. It was messy, fun, and full of laughter. Despite our chocolate curls being a tad wonky, the cake was a hit, and the experience turned into a cherished memory. Now, every time I make chocolate curls, I’m reminded of that special day.
MORE OF OUR FAVORITE…
Why You’ll Love This Recipe
There are countless reasons to fall in love with making chocolate curls. Firstly, it elevates any dessert. What might start as a humble cake is transformed into a patisserie masterpiece with gorgeous, intricate curls adorning it. Secondly, it’s budget-friendly. Instead of buying expensive decorations, you can create them at home with just a bar of chocolate and a few simple tools. Finally, because it’s versatile! You can customize the curls with various types of chocolate and add flavors, like mint or orange.
Ingredients Notes
The key ingredient in this recipe is, of course, chocolate. Opt for high-quality chocolate bars, ideally with a cacao content of 60-70% for a rich flavor. White or milk chocolate also works beautifully. If you’re vegan, there are excellent dairy-free chocolate options available. Before starting, ensure your chocolate is at room temperature for the best curling consistency.
Recipe Steps
Step 1
Melt the chocolate gently over a bowl of simmering water. Ensure the water doesn’t touch the bowl to prevent overheating. Once melted, let it cool slightly.
Step 2
Spread the chocolate onto the back of a baking sheet using a large offset spatula. Aim for an even, thin layer to make curling easier.
Step 3
Let the chocolate set at room temperature. It should be firm but not completely hardened. This stage is crucial for achieving the perfect curl.
Step 4
Using a pastry scraper or a sharp kitchen knife, gently push against the surface of the chocolate. If it’s at the right consistency, it should curl immediately.
Step 5
As you create each curl, transfer them to a plate. Refrigerate the curls if you won’t use them immediately to maintain their shape.
Storage Options
Store your chocolate curls in an airtight container in the refrigerator if not used immediately. If you want to store them longer, freeze the curls placed between layers of parchment paper to avoid sticking. Thaw them in the fridge or at room temperature before use to maintain their texture and shape.
Variations & Substitutions
For a flavor twist, consider adding a few drops of essential oils, like peppermint or orange, to the chocolate before spreading it. For those seeking a sugar-free option, use dark chocolate sweetened with stevia or monk fruit. To ensure inclusivity for those with allergies, opt for hypoallergenic chocolate, which is free from peanuts, tree nuts, and soy.
Frequently Asked Questions
Can I use chocolate chips instead of a chocolate bar?
Yes, you can use chocolate chips, but ensure they’re of high quality and not designed to hold their shape, as some baking chips are. These chips can sometimes contain stabilizers that might not melt as smoothly as a chocolate bar.
Why do my chocolate curls break?
If your chocolate curls are breaking, it might be too firm. Allow it to soften slightly at room temperature before attempting to curl again. Humidity and room temperature play significant roles; experimenting a few times might be necessary to find the optimal conditions.
Can I use a vegetable peeler instead of a knife for curling?
Yes, a vegetable peeler is an excellent tool for making chocolate curls if you find a knife challenging to use. Just ensure the chocolate layer isn’t too thick, or the curls might not form properly. Experiment with angles and pressure to achieve your desired curl size.
Frequently Asked Questions
How to Create Chocolate Curls: A Step-by-Step Guide
Ingredients
Main Ingredients
- 8 oz dark chocolate Finely chopped
Instructions
Preparation Steps
- Melt the chocolate in a microwave-safe bowl, stirring every 30 seconds until smooth.
- Pour melted chocolate onto a flat surface and spread evenly using a spatula.
- Let chocolate cool slightly until it is still pliable but not too runny. Use a spatula or scraper to scrape and curl chocolate.