
Christmas Pinwheel Cookies Recipe

Celebrate the festive season with delightful swirls of color and flavor with our Christmas Pinwheel Cookies recipe. Perfect for holiday gatherings and a treat for the eyes, these cookies combine buttery goodness with a hint of vanilla, ensuring they’re a hit with both kids and adults. Whether you’re an experienced baker or new to the kitchen, this recipe offers a fun and straightforward way to bring some magic to your dessert table.
I remember the first time my grandmother handed me a batch of these vibrant cookies. We sat by the fireplace, the warm aroma filling the room, and she shared stories of her childhood Christmases. It’s become a family tradition, turning the kitchen into a merry workshop every December, each cookie a testament to our shared love and laughter.
MORE OF OUR FAVORITE…
Why You’ll Love This Recipe
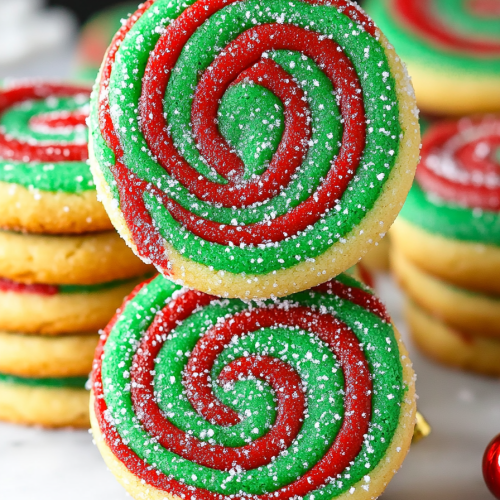
- Festive Appeal: The colorful swirls make these cookies a standout on any holiday dessert table.
- Kid-Friendly: A fun project for kids, allowing them to participate by rolling and shaping the dough.
- Undeniably Delicious: Buttery and sweet with just the right touch of vanilla.
- Make-Ahead: The dough can be prepared in advance, so you can enjoy stress-free baking during busy holiday times.
Ingredients Notes
For the best results, use high-quality unsalted butter to ensure a rich, buttery flavor. If you’re out of unsalted butter, salted butter can be used, but remember to adjust the added salt accordingly. The choice of food coloring is entirely up to you; however, gel food coloring tends to offer the most vibrant results. Vanilla extract adds a subtle depth of flavor, but for a twist, try using almond extract instead.
Recipe Steps
Step 1
Begin by creaming together the butter and sugar until light and fluffy. Slowly add in the egg and vanilla extract, ensuring everything is well combined. It’s crucial to achieve a smooth and creamy base for perfect cookies.
Step 2
In a separate bowl, mix the flour, baking powder, and salt. Gradually incorporate this mixture into the creamed ingredients until a dough forms. The consistency should be firm yet pliable, ideal for rolling out later.
Step 3
Divide the dough into half. To one half, add red food coloring and knead until the color is uniformly spread. Do the same with green food coloring for the other half. This step is essential for the pinwheel effect.
Step 4
Roll each colored dough into thin rectangles of similar size. Carefully layer one sheet over the other, then gently roll them together into a tight log. Wrap this log in plastic wrap and refrigerate for at least 2 hours or until firm.
Step 5
Preheat your oven to 350°F (175°C) and line a baking sheet with parchment paper. Slice the chilled dough log into 1/4-inch thick rounds. Place them on the prepared baking sheet and bake for 10-12 minutes or until the edges are lightly golden. Cool on wire racks before serving.
Storage Options
Store these cookies in an airtight container at room temperature for up to a week. If making in advance, the dough log can be frozen for up to three months—just thaw in the refrigerator overnight before slicing and baking. For leftover cookies, reheating is as simple as a few seconds in the microwave for a fresh-from-the-oven experience.
Variations & Substitutions
- For a gluten-free version, substitute all-purpose flour with a gluten-free baking blend.
- Experiment with different extract flavors like peppermint or lemon for a unique twist.
- Add mini chocolate chips or sprinkles to the dough for added texture and fun.
Frequently Asked Questions
Can I use liquid food coloring instead of gel? Yes, you can use liquid food coloring, but you may need a larger quantity to achieve the same vibrant hues. Start with a few drops, adding more as needed until you reach your desired color intensity.
How can I make these cookies vegan? To make this recipe vegan, substitute butter with a vegan buttery spread and use a flax egg (1 tablespoon ground flaxseed mixed with 3 tablespoons water) instead of a regular egg.
Why is my dough too sticky? If your dough feels too sticky, it might be too warm or not enough flour was added. Chill the dough for 15-20 minutes to firm it up or lightly flour your rolling surface. Ensure the butter is not too soft when starting to avoid overly sticky dough.
Frequently Asked Questions
Christmas Pinwheel Cookies Recipe
Ingredients
Main Ingredients
- 1.5 cups all-purpose flour sifted
- 0.5 teaspoons baking powder
- 0.25 teaspoons salt
- 0.75 cups unsalted butter softened
- 0.75 cups sugar
- 1 teaspoons vanilla extract
- 1 egg large
- 1 tablespoons red food coloring adjust for desired color
Instructions
Preparation Steps
- In a bowl, whisk together flour, baking powder, and salt. Set aside.
- In a large bowl, cream together butter and sugar until light and fluffy. Beat in vanilla extract and egg.
- Gradually add flour mixture to the butter mixture, mixing until just combined.
- Divide dough in half. Tint one half with red food coloring.
- Roll out each dough half between sheets of parchment paper into rectangles. Layer one dough on top of the other, then roll tightly into a log.
- Chill the dough log for at least 1 hour.
- Preheat oven to 350°F (175°C). Slice chilled dough into 1/4-inch thick slices and arrange on baking sheets.
- Bake in preheated oven for 10 minutes, or until edges are golden. Let cool on a wire rack.